Embroidery Stitches Sampler Book Part 2
The construction of the embroidery stitches sampler books is hard to describe for this crafts how-to. I hope the photos help and that I can effectively describe how I put them together and make sense instead of being clear as mud. If you click on an image, you will get a closer view. It will not be a slide gallery, though. Note! I put my favorite stitches in a gallery –
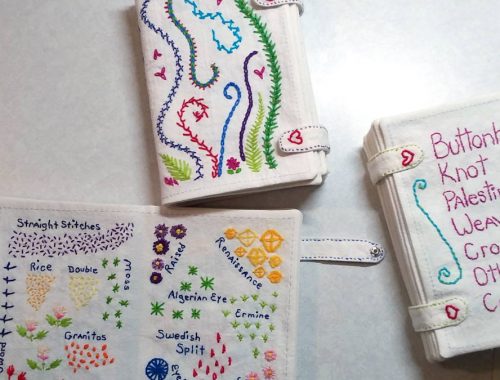
Embroidery Stitches Sampler Books Gallery
Here we go…

Once all of the sampler pages/sheets were finished, I realized that one book would be difficult to sew together. Two books would have still been a bit of a booger. I ended up with 19 stitch groups. One group has 72 stitches in it! I divided them into 3 even-ish piles, making sure a group was not split between the books.

Next, I needed to cut away the extra material neatly and make sure all were the same size. I ended up redrawing the lines over the white stitch marks (remember- 10″ by 7-1/2″), with the washable fabric pen. It would be cut away mostly and hidden in the seams. I used my rotary cutter on the mat to get a nice cut. I used the light for my makeshift light-table, hanging it off two containers. The photo does not show the mat or cutter.
I best note now that the first sampler page is not to the outside of the book. I made covers once I put the pages together. They will be attached after sewing together the books.

Arranging pages for sewing 1 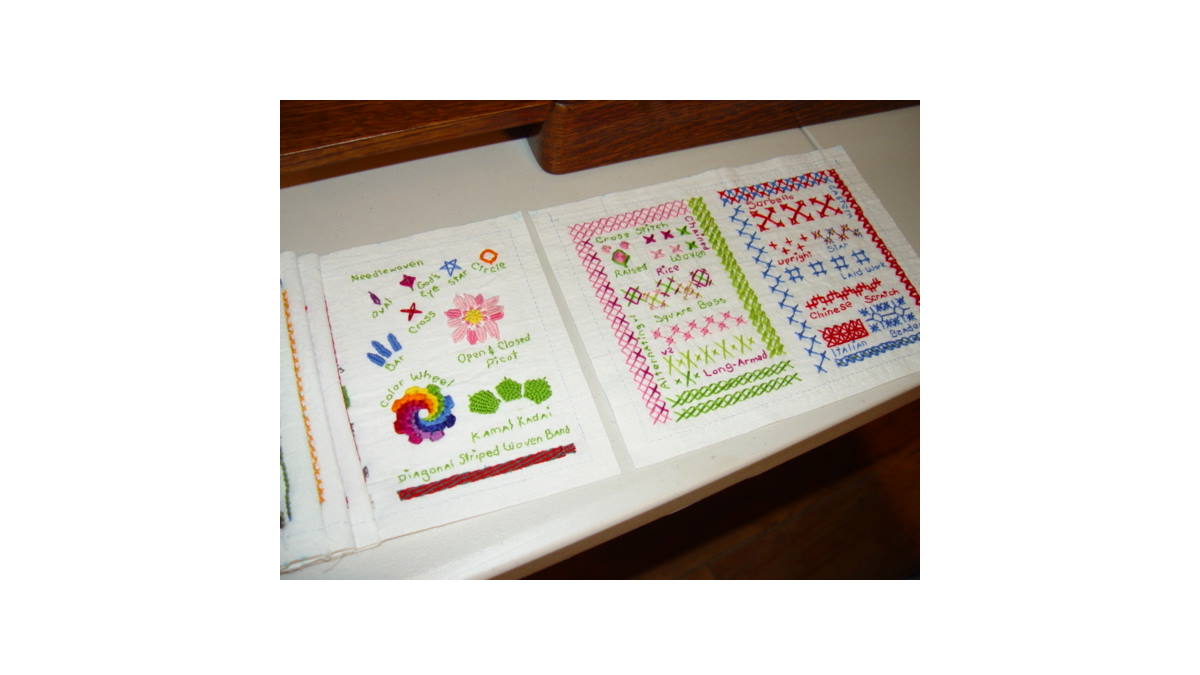
Arranging pages for sewing 2
We are at the hard-to-describe part. The books are put together to be like an accordion-fold. Sampler block 1 (page 1, odd) is to the left and sampler block 2 (page 2, even) is to the right.

I laid the first page down then laid what will be page 3 on top of page 2, right sides facing.

I pinned the side, then the top and bottom 4-3/4″ total from the outer edge heading towards the center page fold. I would be sewing the top and bottom to the end of the page, leaving the 1/2″ page middle unsewn. I hope my photos help.
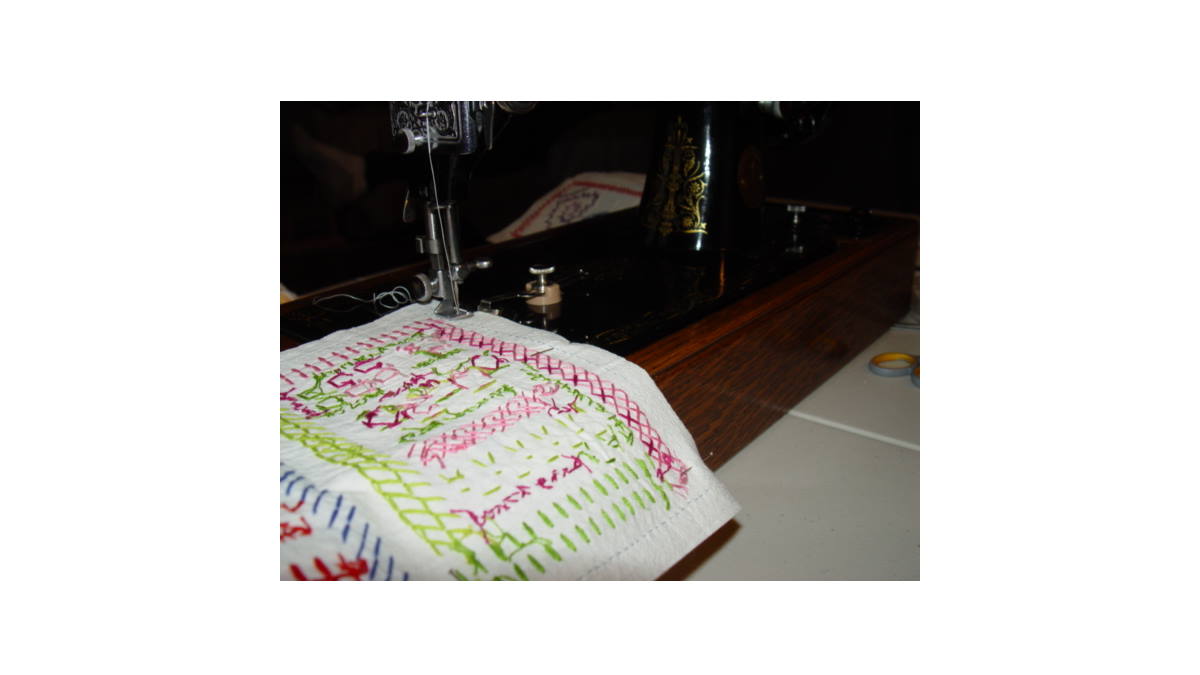
I used my hand-crank sewing machine and sewed a 1/4″ seam in the page edge first. My hand-crank sewing machine is the perfect tool when you want full control of speed while sewing something this fiddly.
You can see in the photos I had already sewed some of the pages together, laying them over accordion style as I added each page. Each page is still inside-out. Once I finished each book’s pile, I rounded the corners with scissors. I then turned each pocket-like page right-side out. I used a rounded-head crochet hook in the corners to push the corners into shape.
Embroidery Stitches Sampler Book
The “accordion-fold” how-to look.

Accordion-fold 2 
Accordion-fold 1
I took some photos today to show the accordion-fold, or “pockets” of the pages.
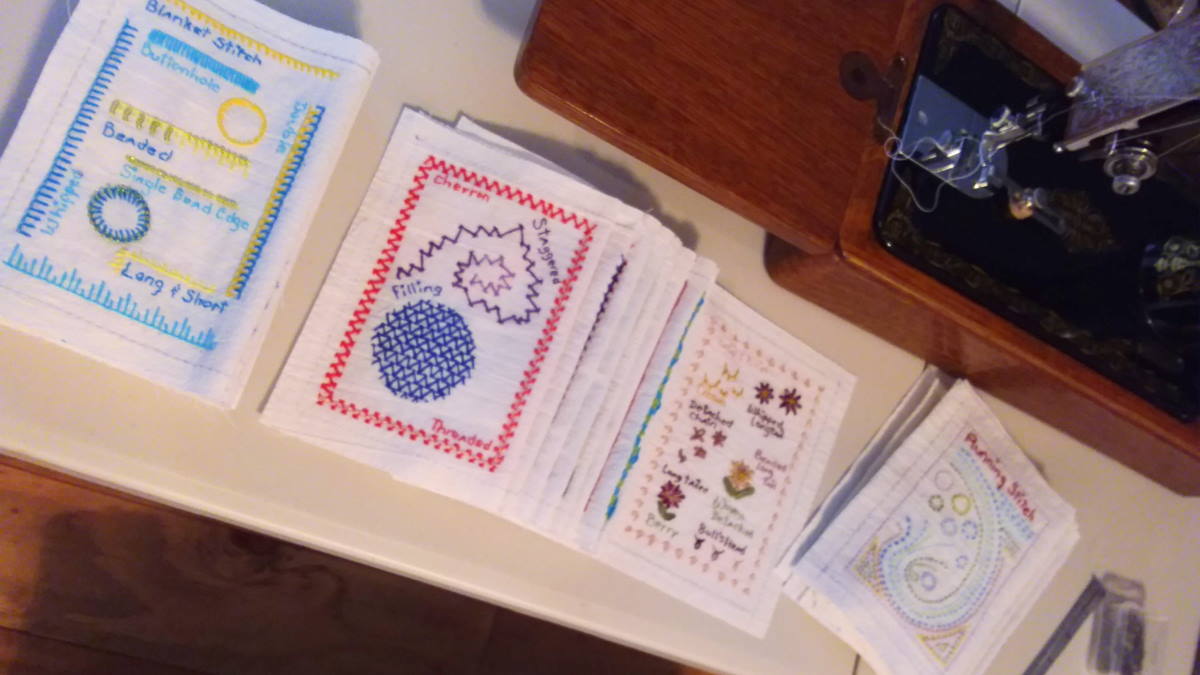
Once all three of the embroidery stitches sampler books were done, I pressed the edges well. I pressed the top and bottom unsewn fold-edges that was left unsewn 1/4″ to match the seams. I then aligned the pages by the corners and gently pressed the page-center folds a little. It was not necessary, really.

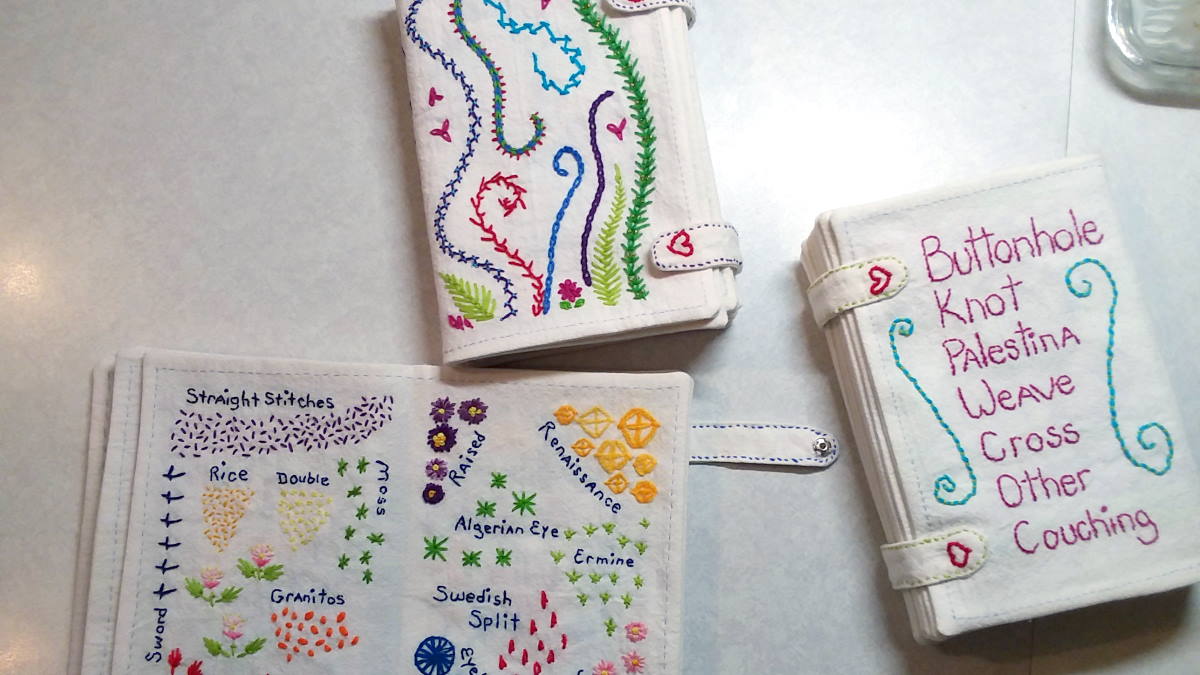
It was time to design the covers. I decided to use my favorites from each group featured in one book on the front of the cover. I put each stitch group name on the backs. I put the stitch book number and “stitches” on each spine. That last bit was not very clever, really.
Wait, how to keep the books neatly closed? A tie around the books would scrunch the samplers and would be a lazy sort of closure. I decided on straps with snaps. I guessed that I would need about 1-1/2″ for the spine. I made the covers 11″ wide by 7-1/2″ tall. I also marked with black basting thread where I would need to attach the straps on the back and for the snaps on the front. This area would be still be marked with the thread after rinsing the fabric pen lines from the covers after I embroidered them.
Once the covers were embroidered, I cut them out like the page-sheets. After embroidering a heart on the strap ends, leaving enough room for the sewing seam not to cover them, I sewed them right-sides together, leaving room to turn them right-side out. After I pressed the straps, I hand-sewed those areas closed. I then sewed the snaps on the front cover and the strap. I sewed the strap down by hand on the spot I made on the back for them. Before I sewed the covers on, I folded the straps to the back and used a safety pin to keep them out of the way of the machine. Sewing them on afterwards would have been difficult.
I laid the cover right-side up, laying the first page on top, right-sides facing inside. I sewed the book edge first. I then sewed the top and bottom like the pages, about 4-3/4″ towards the spine area of the cover.
This is where it got difficult and it is difficult to describe. In hindsight, I wish I had taken a photo of this. I rolled the pages and slightly stuffed them into the pocket that came from the first page and front cover being sewed together to give me some room to attach the back cover to the last page of the book.
I put the last page of the book on the table, right-side up. I stretched over the top the book-cover, right-side down, matching the back of the cover’s edge to the last pages and pinned them together. I sewed that edge. I then pinned the top and bottom of the page together, BUT! this time I pinned the edge 3-1/4″ towards the spine area of the cover. Why? It would make turning the cover and end pages right-side out much easier.
All ready for finishing 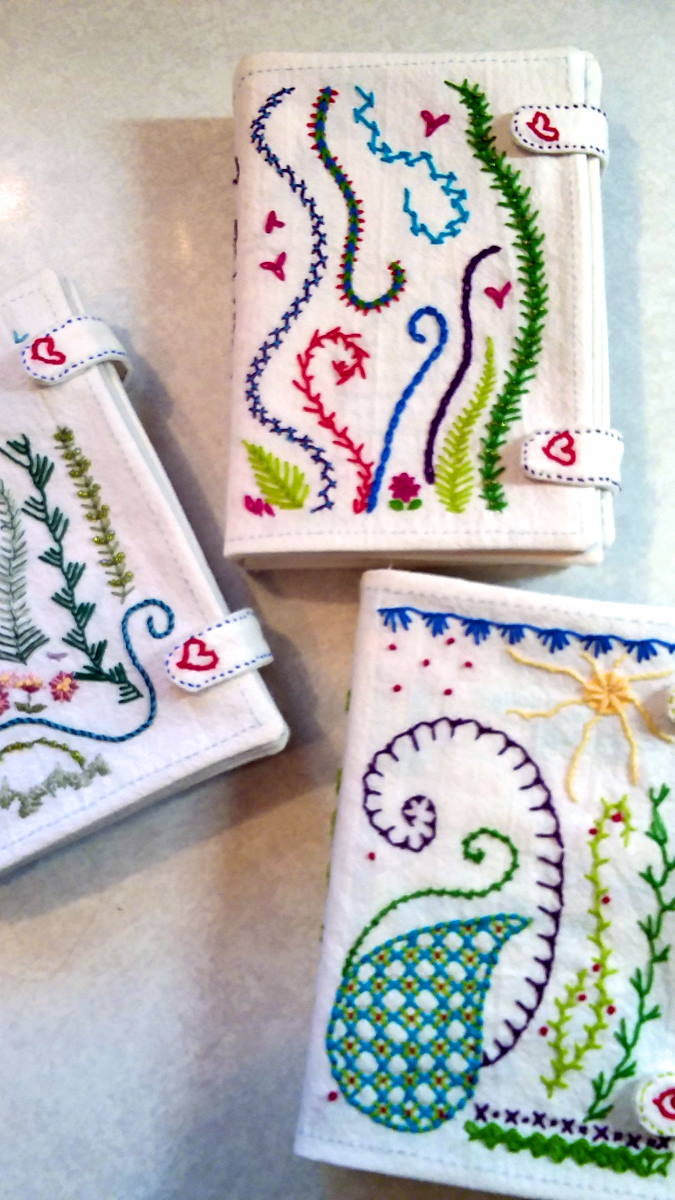
Fronts ready for finishing 
Backs ready for finishing
After turning the pages right-side out, getting the corners pushed into place, I removed the safety pins holding the straps out of the way. I pressed the edges and the unsewn top and bottom fold 1/4″ to match the sewn seam. The unsewn 1/4″ folds on the spine of the books will be secured, as well as the 1-1/2″ of the back page/cover, as you will see here soon.
I decided I liked the blanket-stitched (buttonhole… whatever) edges on Maya’s books. I also wanted a way to find the stitch group easily. Normally, one uses tabs. Oooo! I know! Each group would have its own thread color.
This part might be easier to understand if one was working along at the same time, but I will try my best to explain this part. I started 6″ inwards on the bottom of the front cover (1-1/2″ spine plus 4-1/2″ page, you lost 1/4″ from the 4-3/4″ when sewing the pages), with one thread color, working around and ending 6″ from the page edge on the top.
I went to the next page. If that was the end of the stitched group, I picked a different color. Say that page 4 was the end of that group. I would use a new color around the edge of page 4. I would see in the book that there was a new color, grab it and open the page to the left like there was a tab on it, seeing page 5. Clear as mud, I know.
Anyway, I started where the blanket stitch stopped from the previous side, blanket-stitching down the unsewn middle-fold area of the page on the bottom, stitched the page edge and then the top of the page, blanket-stitching down the unsewn middle-fold area of the page on the top and ending where the previous page stopped. Check out the Embroidery Stitches Sampler Books gallery to get an idea.
Each time I came to what would be a new stitch group on the following (left/odd) page, I changed the thread color and did the whole group in that color until the page would be a new stitch group on the next page. Does that make any sense? I hope so!
Ah… The last page/back cover… I used whatever color thread I used for the last stitch group. Remember – the last page and the back cover were only sewn 3-1/4″ from the edge for ease of turning right-side out after sewing.
You may have noticed that the pages were sewn together for the depth of the sampler block’s ending before page fold. I pinned the last page and back cover that were left unsewn together to the end of the sampler block’s ending. I started the blanket-stitch like the previous pages, then sewed the pages together once I reached the point where I marked with the pin as I blanket-stitched around, doing the same on the top edge of the book. Look at the accordion book-fold photos way above for a visual. They may help.
Whew! I do hope that is clearly explained. I do not have a way to video this which would have made it cleared to explain. I hope the photos help. Looking at the sampler books gallery may be helpful at this point.

Before assembling the book, you could iron on that stiff facing stuff on the pages or slip a thin bit of cardstock to stiffen the pages after assembling if wanted. I did not like either concept, personally. I may add color beads matching the group’s thread color on just the first page of the group at some point. I have not decided.

I have another book to go with decorative stitches I have on hand for learning to embroider fancy flowers, leaves and such. I left those for next winter. They do not fit into the “regular” stitch groups and are better suited to their own little book in my view. I hope you all enjoyed my latest crafts how-to and that it was helpful!
One could make a fun book for a small child this way. The blanket-stitched edges do not have to be added and could be hand-sewn instead, making the book easier to wash when needed.
For those who got their dander-up over me calling “blanket stitch” by that name during my description of construction instead of “buttonhole stitch”, no apologies. I personally find the gaps in the stitch to be distinguished as “blanket” and “buttonhole” for the close stitches more suited for making a buttonhole, and when stitching the stitch name in the samplers for space reasons. Relax, it will not mess up the fabric of the universe. Smiling…
Now, go create something that makes you smile.


you may also like

How to Make a Custom Reading Deck Box
Embroidery Stitches Sampler Book Part 1
