Homemade Pizza Dough, Calzones & Pizza Sauce Recipes

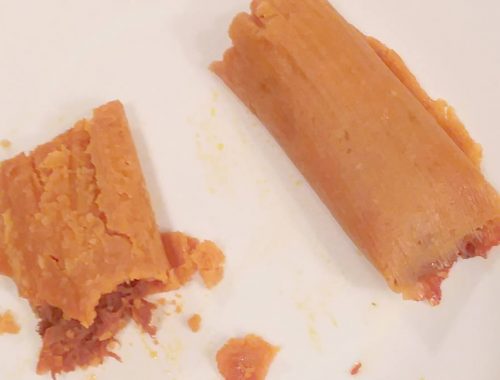
This will be a long post of recipes for my killer homemade pizza dough, making the pizzas, making the dough into homemade calzones instead, and my homemade pizza sauce recipe. We just had calzones and I took a photo of the freshly baked first pan of 4 of them. No, I did not “plate” the calzones or pizzas before taking photos. I am not a professional cook, I am an abby-normal woman who loves to cook good food.
Sometimes things are not perfect. If they taste wonderful, that is all that matters. I have noticed some people get all freaked out when it does not come out “pretty”. Personally, I find this anal-retentive and bizarre. To each their own.
We do not eat out. the homemade pizza dough I came up with rivals any store-bought version. Making the pizza dough into the homemade calzones recipe is especially great for when we travel as a “Good to be home!” meal to pull out of the freezer. For those not into sauce, there is no sauce inside.
The homemade pizza sauce recipe was one I came up with for canning. You can also “juice up” a pint jar of tomato sauce with herbs and spices if you do not want to make a large batch for canning. That recipe can also be frozen in pint containers. I do suggest adding a small jar of tomato paste to thicken it up a bit. As usual, I use only organic/gmo-free ingredients. Always.
The dough recipe will make 2 large pizzas, 4 medium pizzas or 8 personal pizzas or calzones. The pizza photos are of 4 medium pizzas. I only make 8 personal pizza-sizes now. The dough is adapted from a focaccia bread recipe, which this will work nicely for also.
Homemade Pizza Dough Recipe

1-1/2 cups warm water (about 105°F to 110°F)
1 tbsp yeast
3 tbsp + 1-1/2 tsp olive oil
(1/4 cup minus 1-1/2 tsp)
3 tsp salt
2 tbsp + 1/2 tsp (heaping) Italian herb seasoning blend
1 tsp granulated garlic (not powder)
4-1/2 cups unbleached flour
In a large bowl, mix the yeast into the water and let the yeast soften, about 10 minutes. Add all of the remaining ingredients. Mix well, then knead a few minutes in the bowl, adding a sprinkle of flour as kneading until it is not sticking to the fingers in gobs. Sprinkle a little flour on your kneading surface. Place dough on top and let rest a few minutes. I use this time to wash up my tools and to butter my bowl, setting it aside.
Knead the dough, adding sprinkles of flour if needed, to make a soft dough that is no longer sticky, but not dry. Place dough in the bowl and turn to coat in the butter. Cover the bowl with a tea towel ran under hot water and wrung out well. (Do I need to write that the tea towel should be clean? Really?) Let rise for 1-1/2 to 2 hours, until doubled.
Lightly grease two baking sheets with olive oil. Dust the pans with cornmeal if you wish. Set aside. Note: If using pizza pans or stones, prepare accordingly.

Punch down dough. Divide into 2, 4 or 8 pieces, depending on pizza size(s) chosen. Roll each out to your desired crust sizes to fit 2 to 4 pizzas crusts per baking sheet, flipping the dough over constantly to get a good, thin dough.

Place the pizza dough on the prepared pans, stretching into size if needed. The dough can shrink or go wonky a little while moving to the pan. I do not always make the rolled edge crusts. Of course, you can if you prefer a “bumper” on the edge of the pizza, adding the rolled edge after placing on the pan, it is easier.
Cover with the tea towel that had been freshly ran under hot water and wrung out well again. Let the dough rise for 1/2 to 1 hour.
Preheat oven to 425°F. Uncover one pan of risen dough.
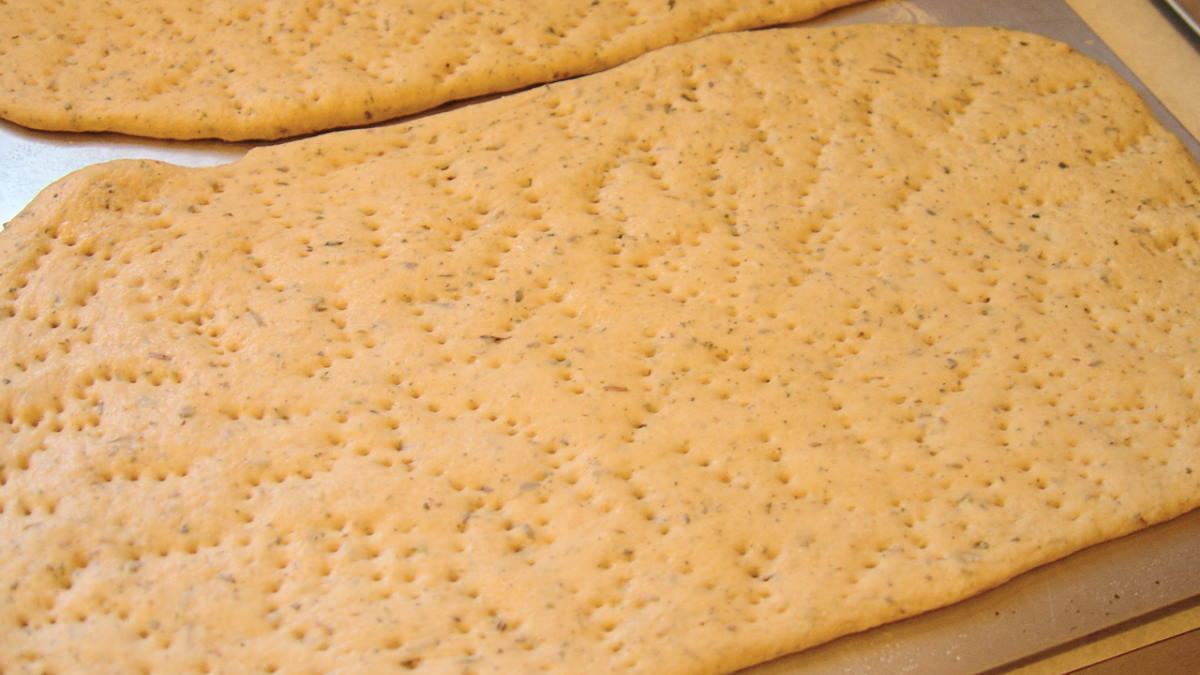
Stab the tar out of the crusts with a fork. Trust me here. They will puff up oddly and it makes any sort of topping slide and the sauce to run, making your oven a mess.
Pop one pan at a time into the oven for about 15 to 20 minutes, until the crusts are lightly brown. Let crusts cool while you gather your favorite toppings. You can let them cool completely, which I normally do, making the crusts earlier in the day. Precooking the crusts means no gooey uncooked pizza dough bottoms due to the toppings. Been there, done that after popping a pizza back in the oven to cook it some more, burning the toppings and, well… you get the drift.

Note: At this point, you can let the crusts cool completely, then wrap tightly and freeze up to 6 months for future use.
I use for the 4 to 8 pizzas:
About 1 pint jar of homemade pizza sauce or homemade tomato sauce with herbs, garlic & 1 tiny jar of tomato paste stirred in
grated Parmesan cheese (NOT the ick in the green can. ew!)
About 2 or 3 cups of grated preferred cheese(s)
pepperoni, chopped
sliced bell peppers
sliced olives
thinly sliced onions
sliced mushrooms
chopped spinach
and so on…

Preheat oven to 350°F. I spread the sauce to within about 1″ of the crust edge. I then sprinkle on the Parmesan cheese then the other cheese(s). I top with our favorite toppings. Bake for about 15 to 20 minutes, until the cheese is melted and the pizza looks as done as your preference. Eat!
Repeat Note: I found baking the pizza crusts for 15 to 20 minutes first, THEN adding the toppings to be better. There is no chance the crust is under-cooked. I can also freeze the crusts for another time. Freezing a pizza with its toppings is awful to me. It makes the toppings and cheeses rather nasty.
Homemade Calzones Recipe
Or crudely, Pizza Hand Pies ;D

I love my homemade calzones recipe! Some call these “Pizza Hand Pies”. One of my grandsons called these “Inside-Out Pizzas”. laughing… These are made like the pizzas for making the pizza dough making and rising portion. In other words, make a batch of the pizza dough recipe.
While the dough is rising, get your filling ingredients preferred for the homemade calzones, except the sauce, ready to go. I found chopping all of the ingredients best for assembling and eating. I forgot to chop the pepperoni the other night, so I tore it into bits while assembling. If I had some whole-fat ricotta cheese on hand, I would of spread a little inside each calzone. It really adds to the flavors.
Sauce is not used inside homemade calzones. You can have sauce for dipping as you eat. Some pour a sauce over the top and then eat. We personally do not use sauce at all when eating them.
Arrange calzone (pizza toppings) filling ingredients within easy reach for assembling, including a small bowl with water. When the dough has gone through its first rising, divide into 8 balls. Lightly grease 2 baking sheets with olive oil.

Roll out the dough ball on a lightly floured surface as thinly as possible but not enough it will tear. This is a “feel” thing. On half of the dough, put enough ingredients as if you were making a small personal pizza, leaving a good 1/2″ of dough-edge free of ingredients. Do not put so much that you cannot stretch the other half of the dough over to seal. ahem…
Wet your fingers and dampen the edge around the filling ingredients slightly, but not too much to get gooey. Stretch the dough over, pressing the dough together gently to seal. Then roll the edge up and press against the calzone to seal again.
Gently lift with both hands and place the calzone on a greased baking sheet. I place them in a way to fit 4 to a sheet. Once all calzones are assembled, dampen the tea towel with hot-as-heck water, wring out well and lay lightly over the calzones. Let rise 1/2 to 1 hour. No, your ingredients will not become rancid or other stories of food fear-porn.
Heat oven to 350°F. Make 1 to 2 holes in the top of each of the calzones before placing the pan in the oven. If you do not, the calzones will find a way to vent that may not be pleasant. Experience talking here. Baking one sheet at a time, bake 25 to 30 minutes. Do leave the unbaked calzones covered with the damp tea towel while the first pan is baking. It keeps the dough from drying out.
Check the bottoms to be sure they are done and not partially cooked. If this occurs, bake 5 minutes more at a time, checking until done. You will have to lay a piece of foil over the top to keep them from over browning. Yes, this happens some days, depending on sunspots, time of day, your mood, whatever, for some reason. In other words, I have no clue as to why it happens.
Let the calzones cool enough to eat. I usually cut one in half and eat it that way. You can use a knife and fork to eat them, blowing on each bite to keep the cheese from melding to the roof of your mouth permanently if too hungry to wait.
Homemade Pizza Sauce Recipe
Homemade pizza sauce is a lovely addition to your homemade pizzas. The flavor is lovely. This recipe is for canning, though it can be frozen instead. The image shown was taken before I started making my tomato sauce in my 6-quart crock pot.

12 or 13 pounds of chopped tomatoes, unpeeled
2 each of minced & seeded red and green bell peppers
1/2 head of minced fresh garlic
4 tbsp Italian herb blend
2 tbsp dried oregano leaves
2 tsp salt
1/2 tsp crushed red pepper

I cook all of the ingredients soft, uncovered, and on “high”, in my 6-quart crock pot, blending after it cooks down a bit with a stick blender. I continue to let it cook until it is the “right” thickness I prefer. Think gravy thickness. The crock pot keeps the sauce from sticking to the pan and you do not have to linger over it. I found 8 hours to 10 hours is about enough most of the time. Putting the sauce on to cook before bed is my method.
From there, I can the sauce.
When I can the sauce, I add 1/4 tsp of organic lemon juice or citric acid to each pint jar. I want to be sure the acidity is correct, being canned in a water-bath. I based my recipe from the Ball Blue Book.
I do NOT peel the tomatoes. The peels have a lot of vitamins and help thicken the sauce. That extra step is a heck of a mess, anyway. Some people do have problems with the peels. It may be because the tomatoes are not organic or they have stomach issues. If you find your tomatoes are bitter to your taste, add a little sugar when warming the sauce for use. (ugh) A personal taste thing, yes?
Paste tomatoes have few seeds, I do not remove those sometimes. It is your sauce, make it the way you want.
Note: Plain tomato sauce will have the salt and lemon juice or citric acid added to the jars before filling and processing after cooking the tomatoes “plain”. I will be able to make the sauce later into whatever flavor I want when using if I leave the tomato sauce “plain”. It makes it more useful, yes?
You ‘all have a good weekend. Enjoy the recipes!

you may also like

Tamales & Fermented Vegetables

Safe Homemade Hand Sanitizer Recipe